In South Africa, our homes are constantly battling the elements. From the torrential thunderstorms and the relentless winter rains to the blistering UV radiation that beats down on our properties year-round, a roof takes a serious punishing. A minor leak, often ignored, can quickly escalate into a catastrophic failure, leading to costly structural damage, unhealthy mould growth, and significant personal stress. This is why effective rooftop waterproofing is not a luxury, it's an essential investment in the longevity and safety of your property. It’s a shield against the climate. But where does one begin? The process can seem daunting, filled with technical jargon and a bewildering array of products.
This guide will demystify the process for you. We will walk you through every critical stage of waterproofing a rooftop in the South African context, from the initial safety checks and meticulous preparation to product selection and final application.
Section 1: The Crucial First Step: Safety and Pre-Checks
Before a single tin of paint is opened, a thorough and safety-conscious inspection is non-negotiable. Working at heights is inherently dangerous, and the South African sun adds its own set of risks.
Safety First – Your Non-Negotiable Checklist:
Weather Watch: Never attempt to waterproof a roof during or immediately after rain, in high winds, or during the hottest part of a summer’s day. The ideal conditions are a cool, overcast, and dry day.
Secure Access: Ensure your ladder is stable, placed on level ground, and extends at least one metre above the roofline. If you are working on a high or steeply pitched roof, a safety harness is not optional, it’s a necessity.
Personal Protective Equipment (PPE): This is your personal armour.
Non-slip footwear: For secure grip.
Safety glasses: To protect your eyes from debris during cleaning and from chemical splashes during application.
Gloves: To protect your hands from harsh cleaning agents and waterproofing products.
Dust mask: Especially important when cleaning or grinding surfaces.
Sun protection: A wide-brimmed hat and generous application of high-SPF sunscreen are vital.
The Rooftop Inspection – What to Look For:
With your safety secured, it’s time to play detective. A successful waterproofing job depends on understanding the roof's current condition. Get up close and inspect every square metre.
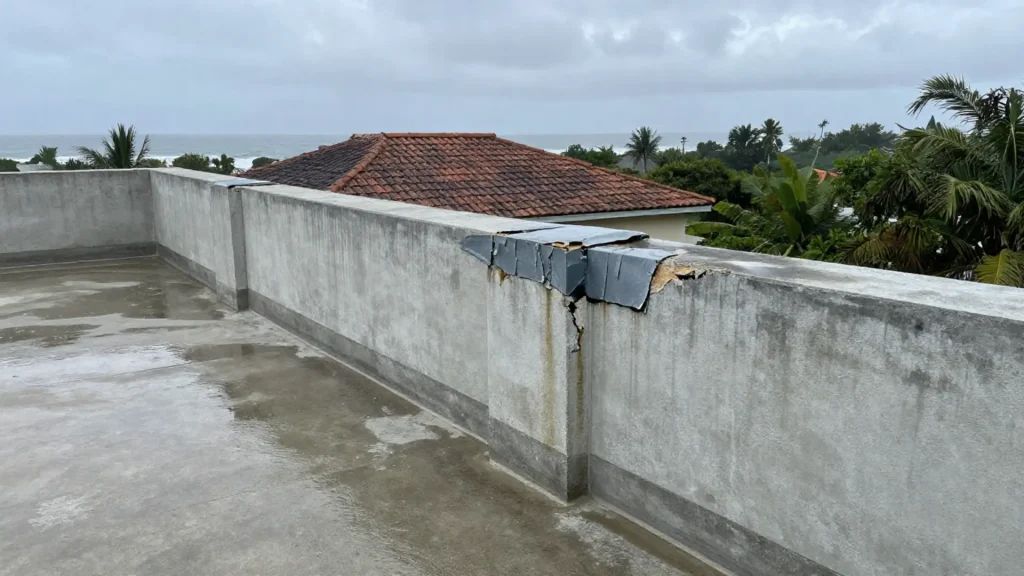
For Concrete Roofs: Look for fine hairline cracks as well as larger, more obvious fissures. Pay special attention to areas where water pools (a phenomenon known as ‘ponding’). Check the integrity of parapet walls and the joints where the wall meets the roof slab.
For Metal Roofs (IBR/Corrugated): Inspect for rusted or loose screws and bolts. Check the overlapping sheets for any gaps or signs of rust. The flashings (the metal seals around chimneys, vents, and skylights) are common points of failure.
For Tiled Roofs: While you typically waterproof the structure beneath the tiles, check for cracked, broken, or dislodged tiles that could be letting water through to the underlay.
General Checks: Look for deteriorated old waterproofing that is flaking, blistering, or peeling away. Check that gutters and downpipes are clear of debris; blocked drainage is a primary cause of water build-up and leaks.
Section 2: Preparation is Everything: Cleaning and Repair
A common saying in the industry is that waterproofing is 80% preparation and 20% application. Any new coating is only as good as the surface it’s applied to. Do not cut corners here.
Step 1: The Big Clean
The goal is to create a surface that is clean, dry, and sound, allowing the new waterproofing system to bond perfectly.
Remove Debris: Start by sweeping away all loose dirt, leaves, bird droppings, and any other debris.
High-Pressure Wash: A high-pressure washer is the most effective tool for removing ingrained dirt, algae, and flaking paint. Be careful not to use a pressure setting that is so high it damages the underlying surface (substrate).
Treat for Growth: If you have signs of mould, lichen, or algae, a simple wash won't be enough. After pressure washing, treat the entire area with a specialised fungicidal wash. This kills the spores within the surface, preventing them from growing back underneath your new waterproofing layer.
Rinse and Dry: Thoroughly rinse the roof to remove any residue from cleaning agents. Now, the most crucial part: the roof must be allowed to dry completely. Applying a waterproofing system to a damp surface will trap moisture, leading to blistering and certain failure. In the dry Highveld winter, this may take a day. In the humid coastal regions, it could take several days.
Step 2: The Repair Work
Now that the roof is clean, its flaws will be exposed.
Crack Repair: For small hairline cracks on concrete, the waterproofing system itself may be sufficient. For larger cracks, you must fill them. Use a high-quality, flexible polyurethane sealant or an acrylic crack filler.
Addressing Ponding: If your flat roof has areas where water pools, you need to address this. If left, the standing water will degrade the waterproofing membrane over time. The best solution is to create a gentle slope (a fall) towards the drains using a repair mortar or screed.
Metal Roof Fixes: Replace all rusted screws with new, oversized, galvanised or stainless steel ones that have a bonded washer. Treat any rust spots with a rust converter and a suitable metal primer.
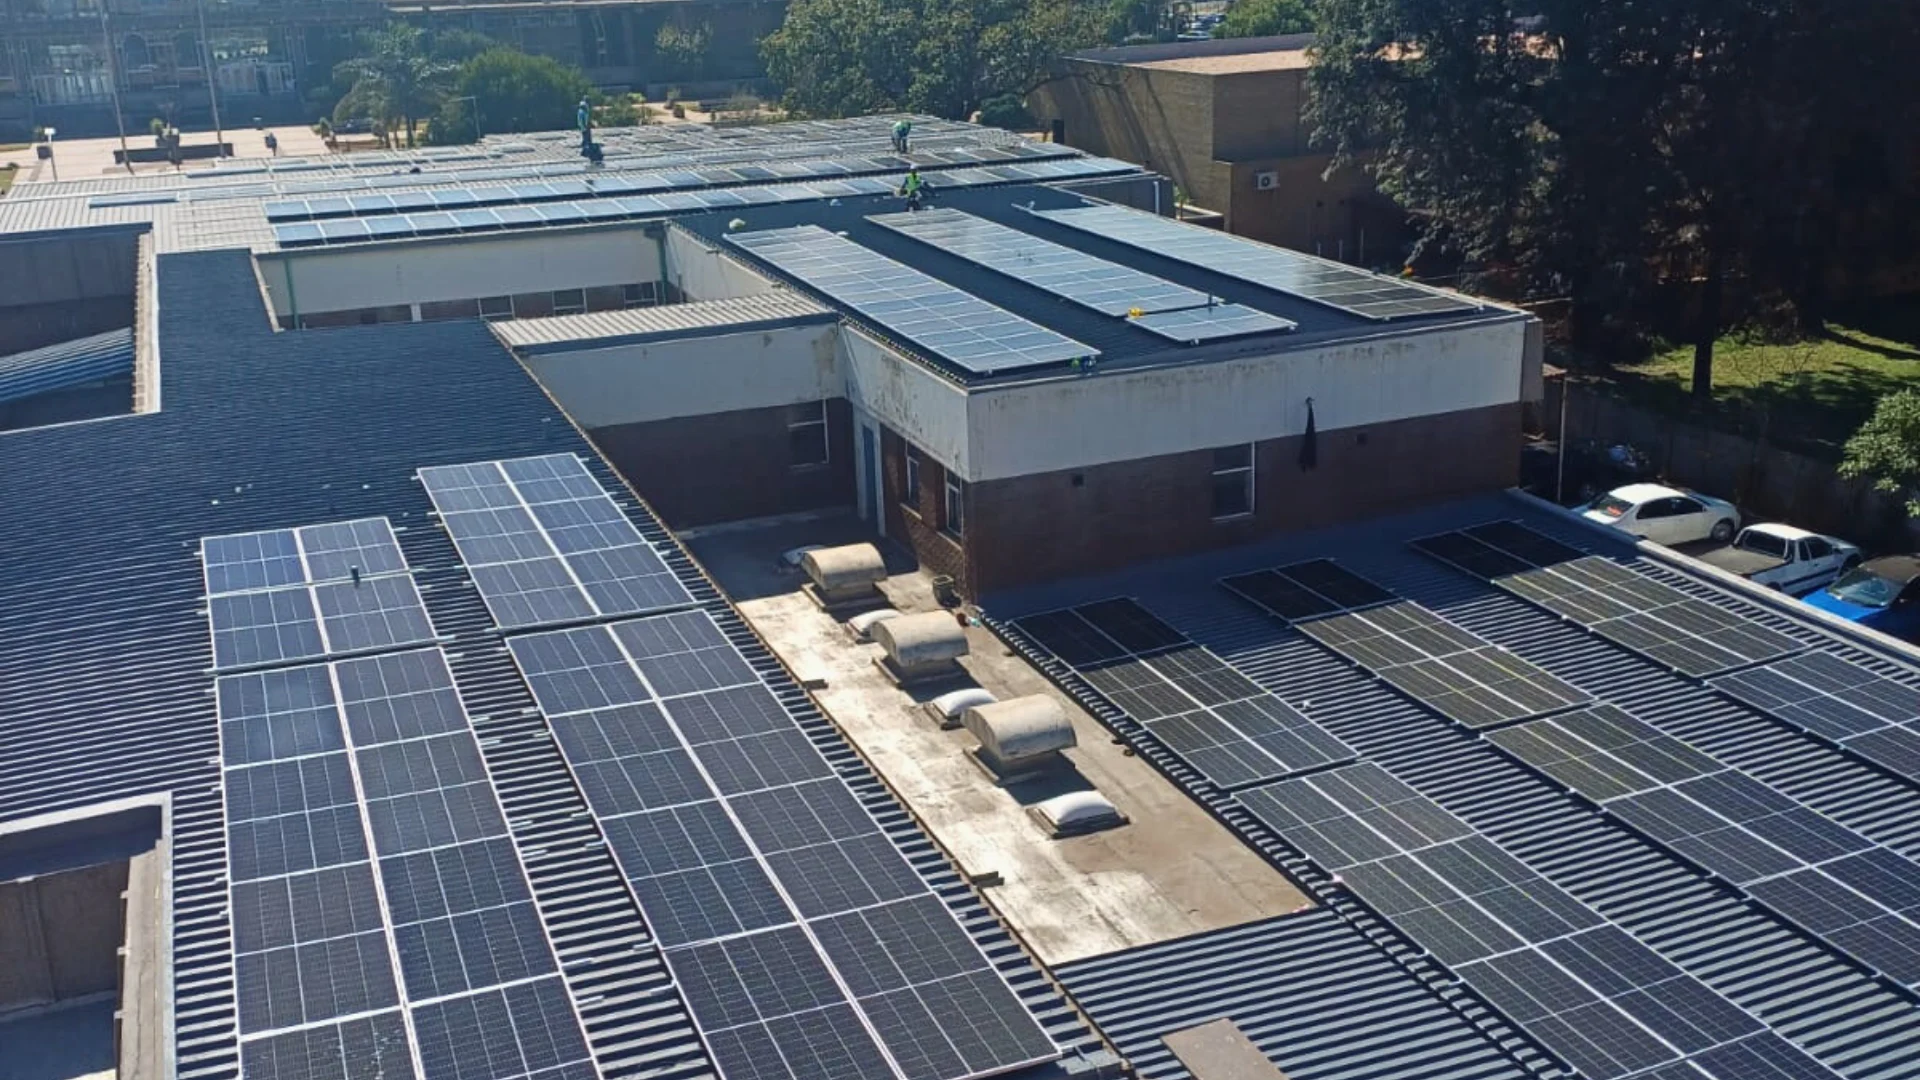
Section 3: Choosing Your Weapon: Recommended Products for the SA Climate
South Africa's harsh UV exposure means you need a product that is not only waterproof but also highly durable and flexible. The “paint-on” liquid-applied membrane systems are the most popular and effective for most residential and light commercial applications.
A proper waterproofing job is a system, not a single product. This system typically includes a primer, a reinforcing membrane, and multiple coats of a liquid waterproofing product.
Key Product Types:
Primers: Think of primer as the double-sided tape between the roof surface and the waterproofing coating. It seals porous surfaces, aids adhesion, and ensures a uniform finish. There are specific primers for concrete, metal, and previously painted surfaces. Always use the primer recommended by the manufacturer of your topcoat system.
Acrylic Waterproofing Systems: This is the most common and versatile choice in South Africa. These are water-based, easy to apply, and offer excellent UV resistance and flexibility. They are almost always used in conjunction with a polyester reinforcing fabric, often called a membrane or geotextile. This fabric adds immense tensile strength to the system, much like steel rebar reinforces concrete.
Bituminous Systems (Torch-On): This involves rolling out sheets of bitumen-impregnated felt and using a large gas torch to melt it onto the surface. It creates an incredibly tough and durable layer but is highly specialised work that should only be done by experienced professionals due to the significant fire risk.
Polyurethane (PU) Systems: These are high-performance liquid coatings that cure to form a seamless, rubber-like membrane. They offer superior flexibility and durability but come at a higher cost and can be more sensitive to application conditions.
For most DIY and general contractor projects on concrete or IBR roofs, a high-quality acrylic system with a reinforcing membrane is the recommended choice for its balance of performance, cost, and ease of application.
Section 4: The Application Process: A Step-by-Step Guide
With the roof clean, dry, repaired, and your product system chosen, it's time for the final push. Always read the manufacturer’s instructions on the tin, as drying times and application methods can vary slightly.
Step 1: Priming
Apply a single, even coat of your chosen primer to the entire roof surface using a roller or brush. Allow it to dry completely as per the product’s instructions. It should be touch-dry and no longer tacky.
Step 2: Detail Work (The Critical Joints and Corners)
This is where most leaks originate.
Apply a thick, liberal first coat of your liquid waterproofing product to all critical areas: cracks you’ve repaired, joints between walls and the floor, around pipes, vents, and drains.
Immediately embed a strip of your reinforcing membrane fabric into this wet coat. Use a brush or roller to press it down firmly, ensuring it is fully saturated and there are no trapped air bubbles.
Step 3: First Full Coat
Once the detail work is complete, apply the first full coat of the liquid waterproofing product to the entire roof surface, working in one direction (e.g., north to south). Ensure you apply it at the recommended spread rate. You are aiming for a thick, uniform layer.
Step 4: Second Coat & Reinforcement
This step is where the system’s real strength comes from.
If reinforcing the entire roof (highly recommended for flat concrete roofs): While your first coat is still wet, roll out the reinforcing membrane fabric over the entire surface, ensuring overlaps of at least 100mm between sections. Use your roller to press the membrane firmly into the wet coating, ensuring it becomes fully saturated. Immediately follow this by applying your second coat of the waterproofing product over the membrane, working it in until the fabric is no longer visible.
If only reinforcing details: Allow the first full coat to dry as per the manufacturer's instructions. Then, apply the second coat in a direction perpendicular to the first (e.g., east to west). This cross-hatch application creates a stronger, more interlocking waterproof barrier and helps eliminate any pinholes or thin spots from the first coat.
Step 5: The Final Top Coat
Allow the second coat to dry completely. Apply a final, third coat for maximum protection and longevity. This final layer is your primary defence against UV radiation and physical wear. Again, apply it at the manufacturer's recommended thickness—a thicker membrane will always last longer.
Step 6: Curing
Patience is a virtue. While the surface may be touch-dry within a few hours, a full chemical cure takes time. This can be anywhere from 3 to 7 days, depending on the product and the weather conditions (temperature and humidity). During this period, it is crucial to avoid any foot traffic on the roof to prevent damaging the newly applied membrane. And, of course, you need to be certain no rain is forecast during this curing window.
Section 5: Final Completion and Long-Term Maintenance
Your roof is now waterproofed, but the job isn't quite over. A little ongoing care will ensure your investment lasts for years, often exceeding the product’s warranty period.
The Final Inspection
Once the system has fully cured, conduct a thorough final inspection. Walk the entire roof and look closely for:
Pinholes: Tiny holes that can compromise the system.
Blisters or Bubbles: Signs of trapped air or moisture.
Uneven Coverage: Areas where the coating looks thin or translucent.
Unsealed Edges: Ensure the membrane is perfectly sealed at all edges and terminations.
If you find any minor imperfections, now is the time to touch them up with a small amount of leftover product.
Your Annual Maintenance Plan
A waterproofed roof is not a “fit and forget” solution. A simple, regular maintenance schedule is the best way to guarantee its performance.
Bi-Annually (Ideally before and after the main rainy season):
Clean the Surface: Sweep away leaves, branches, dust, and other debris. Accumulated organic matter can hold moisture and promote algae growth, breaking down the coating over time.
Check Drainage: Ensure all gutters, downpipes, and drainage outlets are completely clear. Blocked drains are the number one enemy of a flat roof.
Annually:
Conduct a Visual Inspection: Look for any signs of physical damage (e.g., from hail, falling branches, or maintenance work on air-conditioning units).
Check High-Stress Areas: Pay close attention to the detailed areas you reinforced at the beginning—the flashings, corners, and joints. Check that the sealant is still intact and flexible.
Look for Fading or Chalking: Severe chalking (a powdery residue) on the surface can indicate that the topcoat is starting to degrade from UV exposure. This is a sign that a maintenance coat may be required in the near future to rejuvenate the system.
Keeping a small, sealed tin of the topcoat product is an excellent idea for making minor repairs to scuffs or scratches as soon as you spot them.
Conclusion: An Investment in Peace of Mind
Waterproofing your roof is one of the most proactive and valuable maintenance tasks you can undertake as a South African property owner. It’s a robust defence against our often-unforgiving climate, protecting your building's structural integrity and the health of its occupants. By following a systematic approach of prioritising safety, committing to meticulous preparation, choosing a quality system, and applying it correctly you transform your roof from a liability into a formidable shield. It's a challenging project, but one that rewards your effort with lasting protection and, most importantly, the peace of mind that comes from knowing your home is safe and secure, come rain or shine.
Protect your property. Protect your investment. One well-prepared, well-coated square metre at a time.
To get in touch with one of our advisors click here