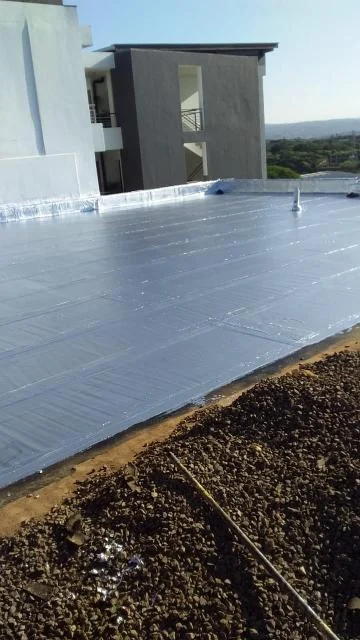
South African flat roofs face a tough mix of conditions: intense Highveld UV, Cape storm fronts, coastal salt spray, temperature swings, and occasional hail. If your centre, warehouse, office park, or retail roof is ponding, leaking at penetrations, or showing blistering, this article explains what’s at stake and how to act now.
Why waterproofing matters for SA property owners
- Protects rental income by preventing shutdowns and tenant claims
- Preserves asset value for refinancing and sale
- Reduces unplanned capex and insurance excesses after storm events
- Improves compliance posture for OHSA and insurer risk surveys
Waterproofing is a strategic safeguard for South African commercial properties because it keeps tenants trading and cash flow steady by preventing leak-related shutdowns and claims. A watertight roof preserves the building’s condition and valuation, supporting stronger refinance terms and smoother sale processes. By avoiding chronic leaks and storm ingress, owners cut unplanned capex and lower the risk of elevated insurance excesses after severe weather. Solid waterproofing, backed by documented maintenance, also strengthens compliance with OHSA requirements and positions the asset favourably in insurer risk surveys, often improving insurability and premiums.
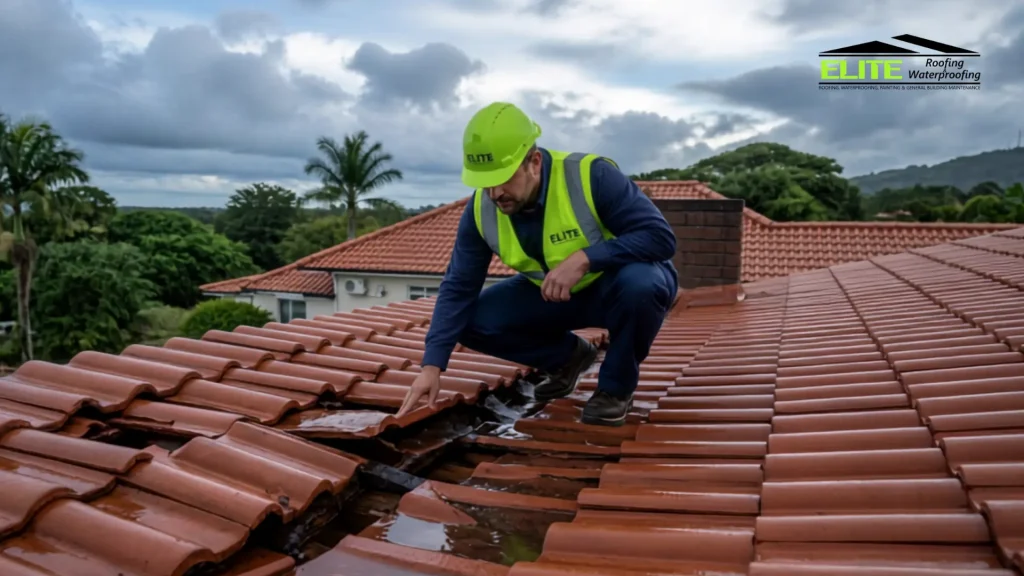
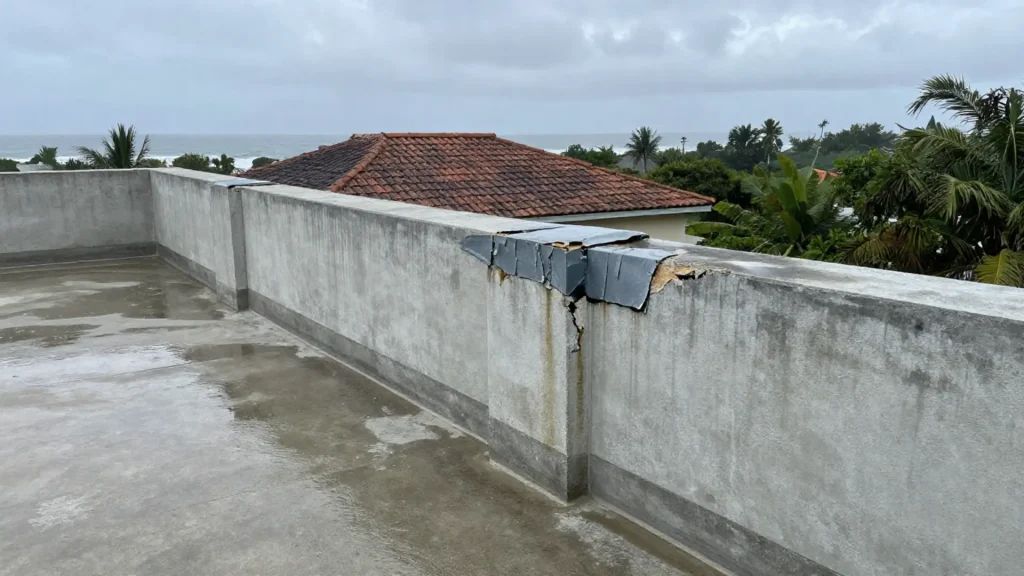
The common failure modes we see locally
- Ponding from inadequate falls or blocked outlets after jacaranda season or Cape leaf-drop
- UV embrittlement of old bitumen felts on the Highveld
- Wind-lift at edges and upstands during Cape Peninsula cut-off lows
- Salt-induced degradation of fasteners and flashings within KZN and coastal corrosion zones
- Thermal movement splitting at parapets, skylights, HVAC plinths, and solar penetrations
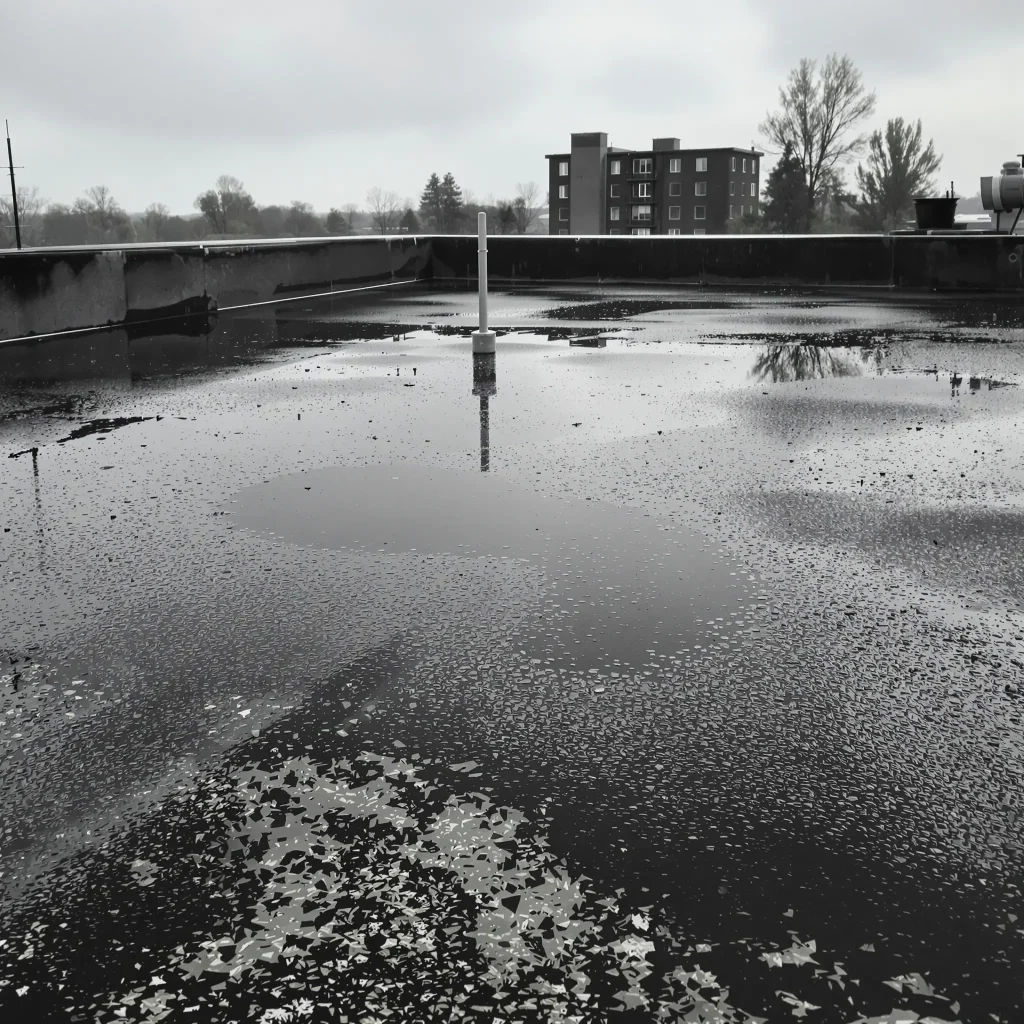
Ponding is the gateway failure on SA flat roofs, usually from inadequate falls or blocked outlets after jacaranda drop or Cape leaf-fall, leading to prolonged wetting, membrane fatigue, and leak paths at seams and penetrations. On the Highveld, extreme UV embrittles older bitumen felts, causing surface cracking and alligatoring that worsens under daily thermal cycling. Cape Peninsula cut-off lows drive high winds that can lift poorly terminated edges and upstands, tearing laps and exposing underlayers. Along KZN and other coastal belts, salt-laden air accelerates corrosion of fasteners and flashings, loosening fixings and opening gaps at details. Across all regions, thermal movement concentrates stress at parapets, skylights, HVAC plinths, and solar penetrations, splitting sealants and membranes unless detailing allows for expansion and is regularly inspected and re-sealed.
Your options at a glance
- Liquid-applied membranes: Seamless, ideal for complex details and refurb over sound substrates. Specify UV-stable topcoats for inland sun or marine-grade systems near the coast.
- Single-ply (TPO/EPDM/PVC): Fast, clean installs with good reflectivity. Ensure mechanically fixed or adhered systems are engineered for local wind zones.
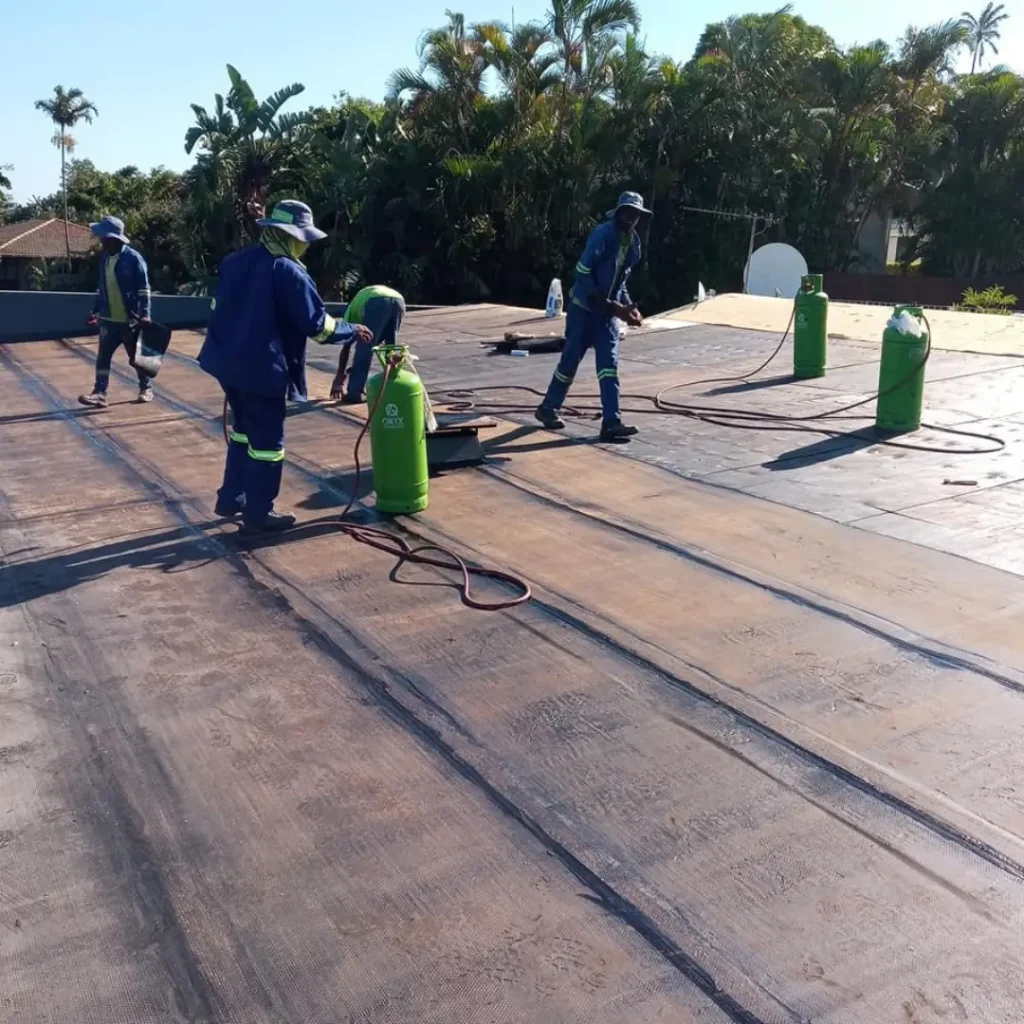
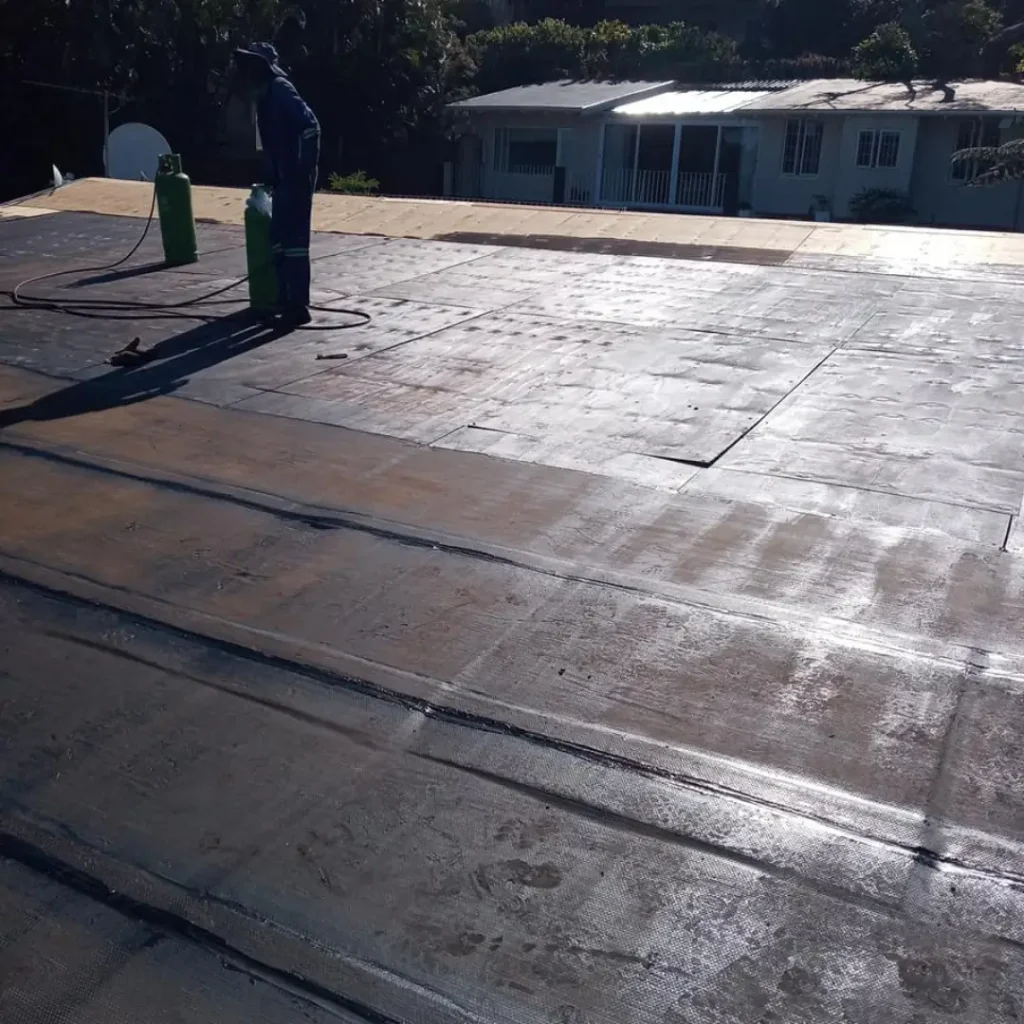
- Built-Up Roofing (modified bitumen): Robust and proven. Needs UV protection (mineral cap sheet or reflective coating) and quality detailing at upstands.
- Spray Polyurethane Foam (SPF): Excellent for correcting falls and insulation. Must be protected with a high-spec elastomeric topcoat and routine inspections.
- Green roofs: Consider on engineered slabs in metros with stormwater attenuation incentives. Requires root barriers and premium waterproofing layers.
Liquid-applied membranes are best for intricate roofs and refurbishments because they form a seamless skin over sound substrates; in South Africa specify high-UV topcoats inland and marine-grade systems on the coast. Single-ply TPO, EPDM, or PVC installs quickly and runs cool, but make sure the fixing method is engineered for your local wind zone and edge uplift risks. Built-Up Roofing with modified bitumen is a robust workhorse; protect it from UV with a mineral cap or reflective coating and pay special attention to upstands and terminations. Spray Polyurethane Foam is ideal where you need to fix falls and add insulation in one pass; its performance depends on a high-spec elastomeric topcoat and scheduled inspections. Green roofs can help with stormwater attenuation and heat-island reduction on engineered slabs in major metros, but they demand proper root barriers, premium waterproofing layers, and a defined maintenance plan.
Practical steps to take this quarter
- Commission a Level 1 condition assessment: Map moisture, note blisters, failed laps, cracked flashings, outlet capacity, and fall-to-drain.
Mapping moisture starts with a systematic grid survey using moisture meters and infrared where available, marking damp zones on a roof plan to reveal hidden saturation and leak pathways. As you walk the grid, record surface blisters and note size and density, since widespread blistering signals trapped moisture and membrane failure. Check all laps for fishmouths or open seams and tag any failed laps for immediate patching. Inspect flashings at parapets, skylights, HVAC plinths, and penetrations for cracks or loose terminations, as these are frequent ingress points. Verify outlet capacity by clearing debris, confirming strainer integrity, and flow-testing with a hose. Finally, measure fall-to-drain with a digital level, noting areas with inadequate falls that promote ponding and prioritising regrading or corrective systems like SPF or tapered insulation.
- Clear and prove drainage: Clean gutters, leaf guards, and sumps. Test with hose. Target no standing water 48 hours after rainfall.
Clearing gutters, leaf guards, and sumps is your first defence against ponding and leaks: remove all debris, lift and rinse guards, and scoop silt from sumps so water can reach outlets freely. Once clean, “prove” the drainage by hose-testing from the high side toward each outlet, watching for slow spots, backflows, or hidden blockages at downpipes. Note any deflection or birdbaths and mark them on a plan. After natural rainfall, inspect again and aim for a simple KPI: no standing water 48 hours later. Areas that still hold water should be flagged for fall correction, additional outlets, or localized regrading to prevent membrane fatigue and premature failure.
- Prioritise high-risk details: Parapets, terminations, skylights, service penetrations, expansion joints, and plant plinths.
Treat detail areas as leak hot-spots and inspect them methodically. At parapets and terminations, check that membranes turn up to the correct height, are mechanically secured, and finished with sound counterflashing or termination bars with sealed fixings. Around skylights and all service penetrations, verify pre-formed collars or pitched pockets aren’t cracked, undersized, or ponding; re-seal or re-detail where movement is evident. At expansion joints, confirm the joint cover is flexible, continuous, and bonded to clean substrates with enough slack to accommodate thermal movement. For plant plinths and curb-mounted equipment, ensure upstands are tall enough, corners are reinforced with gussets, and vibration hasn’t loosened fasteners. Document defects with photos and prioritize re-detailing before coating so the system remains watertight under wind, UV, and thermal cycling.
- Specify for your microclimate: Coastal: chloride resistance and stainless or coated fixings. Inland: high UV stability and hail resilience. Karoo/Free State: large thermal range flexibility.
Specify to your microclimate. Coastal sites need chloride-resistant systems with stainless or well-coated fixings, sealed terminations, and marine-grade topcoats to combat salt spray and corrosion. Inland roofs should prioritise high UV stability to withstand intense sun, plus hail resilience through thicker membranes, reinforced caps, or impact-rated coatings. In the Karoo and Free State, where diurnal swings are large, select systems with high elongation and flexible detailing at joints and penetrations, using compatible primers and movement-allowing terminations so the assembly tolerates repeated thermal cycling without cracking or delaminating.
- Insist on system warranties: Material + workmanship, ideally 10–15 years, with maintenance clause clarity.
Insist on a single, integrated warranty that covers both materials and workmanship, preferably for 10–15 years, issued or backed by the system manufacturer and the approved installer. Specify what’s included and excluded, response times for leaks, and the process for claims. Make the maintenance clause explicit: required inspection cadence, cleaning of outlets, permitted repairs, and who may perform them. Require a handover pack with QA photos, wet film thickness logs, primer and batch numbers, as-builts, and a maintenance checklist. Tie warranty validity to documented maintenance and to using compatible products for any future penetrations or additions.
Budget guidance
- Liquid-applied refurb: medium cost, minimal tear-off, strong ROI where detailing is complex
- Single-ply overlay: medium-to-high upfront, quick programme, energy savings from cool roof
- Modified bitumen: medium, durable if properly protected from UV
- SPF with coating: medium, adds insulation and corrects falls in one go
Think in bands and drivers. Liquid‑applied refurb usually lands mid-range because you avoid most tear‑off; it shines where detailing is complex, so labour efficiency and leak‑risk reduction deliver strong ROI. Single‑ply overlays sit medium‑to‑high upfront but run fast on programme and can pay back via “cool roof” energy savings and lower maintenance. Modified bitumen is a solid mid-tier choice provided you budget for UV protection from day one, otherwise lifecycle costs rise. SPF with coating is mid-range but uniquely adds insulation and can correct falls in one pass, often offsetting cost through energy savings and reduced ponding repairs. Expect final pricing to move with access and logistics, substrate condition and wet core removal, building height and cranage, safety file and compliance requirements, and materials exposed to exchange‑rate swings.
Note: Final pricing varies by access, substrate condition, height, safety file requirements, and exchange-rate sensitive materials.
Compliance and documentation
- Health and safety: Fall protection plan and Method Statement per Construction Regulations
- Fire: Verify system fire rating for occupancy and insurer requirements
- Warranty: Keep QA photos, primer logs, wet film thickness records, and maintenance plan on file
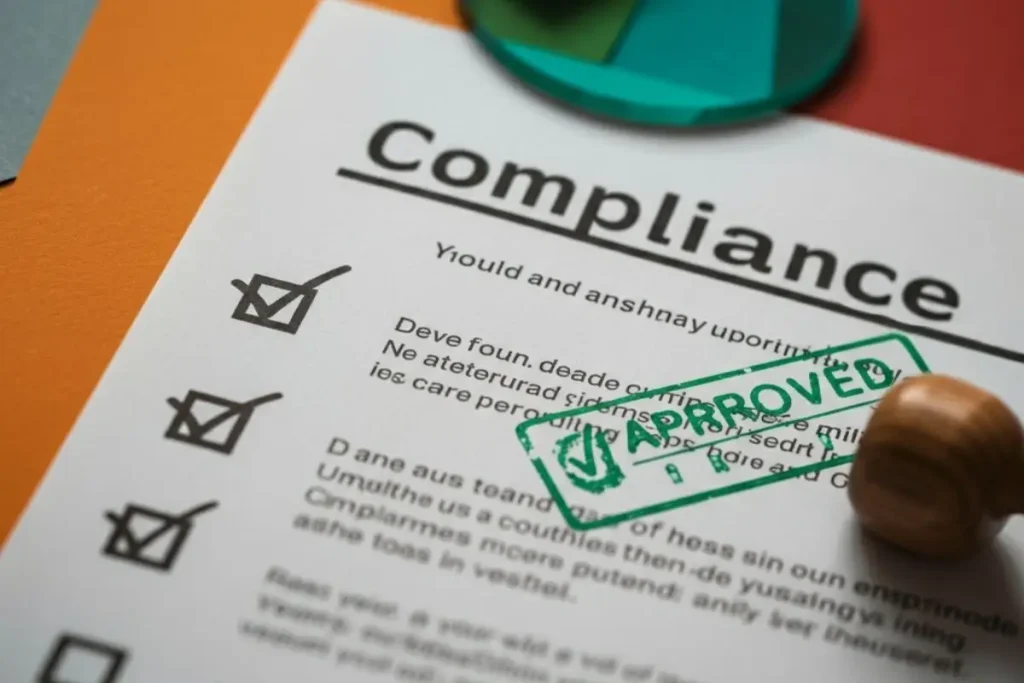
Compliance starts with safety and proof. For health and safety, require a site-specific Fall Protection Plan and Method Statement aligned to the Construction Regulations, including access control, edge protection, rescue procedures, and toolbox talks. For fire, confirm the installed system’s fire rating is suitable for the building’s occupancy class and meets insurer requirements, and document test standards and certificates. For warranty and audits, keep a complete QA pack: dated photos of each stage, substrate prep notes, primer logs and batch numbers, wet film thickness readings per area, weather records, as-builts, and a clear maintenance plan with inspection cadence. Tie payment milestones and handover to receipt and verification of this documentation.
Maintenance checklist for South Africa
- Autumn and spring inspections aligned to rainy seasons in your region
- Remove debris and silt build-up at outlets and along parapet edges
- Touch-up coatings at high-traffic service routes and ladder landings
- Reseal minor cracks at terminations before the first big fronts
- Log every visit with photos to keep warranties valid
Align inspections with your local rainy seasons by scheduling full roof checks in autumn and spring, then keep drainage free by clearing debris and silt at outlets and along parapet edges on every visit. Protect wear zones by touching up coatings along service routes and at ladder landings before traffic scuffs expose the membrane. Before the first big fronts, reseal minor cracks and terminations so wind-driven rain cannot track in. Document each visit with dated photos and brief notes; this record keeps warranties valid and helps you spot trends before they become costly.
When to repair vs replace
Localised damage, sound substrate: repair and overcoat
For localised damage on a sound substrate, cut out and dry the affected area, repair laps or patch the membrane to restore integrity, then overcoat the entire roof or a defined zone with a compatible system. This seals hairline defects you cannot see, unifies ageing patches, and extends service life without full tear‑off. Verify adhesion with pull tests and respect manufacturer minimum thickness; reinforce around details and previous repairs. Finish with a UV-stable topcoat and add the area to your maintenance log for early reinspection after the next major rain.
Widespread saturation, failed falls, multiple wet cores: plan a phased replacement with thermal upgrade and revised drainage
When testing shows widespread saturation, failed falls, and multiple wet cores, scope a phased replacement rather than chasing patches. Strip wet areas to sound substrate, redesign falls with tapered insulation for a thermal upgrade, and add or upsize outlets, sumps, and overflow scuppers to meet drainage codes. Sequence work by risk and tenant impact, isolating zones with temporary terminations so the roof remains watertight between phases. Specify a full compatible system with reinforced detailing, verify adhesion and pull-out values, and capture as-builts, moisture maps, and core logs. The result is a warmer, drier roof with corrected drainage and a system warranty that starts clean on each completed phase.
Recommended Solution
Experiencing leaks, ponding, or tenant complaints? Take immediate action by scheduling a professional roof survey and drainage cleaning this month. For reliable results, choose Elite Roofing & Waterproofing, with over 30 years of industry expertise, thousands of successfully completed projects, premium SABS‑approved materials for lasting protection, and guaranteed workmanship backed by product warranties.
Contact us today to arrange your assessment and receive a customized, cost‑effective plan. We cater to the greater Durban area.